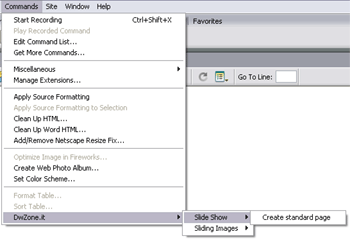
1°)To help you in using the extension I create a command that create a standard page with all you need to use the extension.
Open the Dreamweaver Commands:
menu >> dwzone-it.com >> Sliding Images

and click on the Create Standard Page link.
In this panel click on the Browse button and select the folder where you need create the page. Change the name of the page if you need.
3°)Click on the Ok button.
My extension create a standard page with the Sliding Images applied and auto-open the page in Dw.
Now double-click on the Server Behavior panel will open the dialog box of my extension.
Insert all the images and all the parameters you need and when finish click on the Ok button Now you can test your page.
4°)In this page you can find this elements:
- the layer "thumbLayer": this is the layer where will be inserted the sliding images (don't delete)
- the layer "imageLayer": this is the layer that contain the image displaied when you click on the thumb (don't delete)
- the image "myImage": the image displaied when you click on the thumb (don't delete), my Js code replace this image with the image corresponding to the thumbnail.
- the layer "textLayer": the layer where is displaied the image text (you can delete this layer if you don't have images text)
- the layer "moveUpLayer": the layer that contain the link to MoveUp the sliding images (don't delete)
- the layer "moveDownLayer": the layer that contain the link to MoveDown the sliding images (don't delete) All this layer can be moved and resized. The layers where I write "don't delete" are required but if you need you can modify the name. If you modify the name you must re-apply the extension to update the name of the layer modified. To create a new MoveUp and MoveDown link use this link:

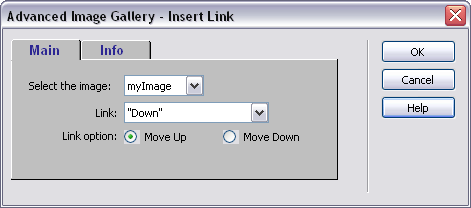
This link open this behavior:

To insert a link:
Select the 'MoveUp/MoveDown slide' trigger (e.g. an image or a text link),
Open the behavior "Advanced Image Gallery - Insert Link".
Select the type of link you need between MoveUp and MoveDown
Click on the Ok button.

